Sally Hansen Miracle Gel in “Combustealble” with Top Coat
Being a barista is very hard on one’s hands. You’re constantly getting your hands wet, prying things open, exposing them to heat, getting them covered in coffee, and generally putting them through lot of wear and tear. For that reason, I constantly am in search of nail polish that can take the abuse – I love having them polished but even if I’m careful, my manicures rarely last more than a day without becoming unwearable.
A while back, however, my bestie down under Dina’s mother Niki posted to FaceBook that she’d tried a product I’ve been skeptical about: Sally Hansen’s “Miracle Gel” line. She says:
I didn’t expect that my 50s would include keeping my nasty nails covered. So that’s why I am uncharacteristically calling out the best new product that I learned about in a magazine. (I can’t remember which one, but HEY! That’s another thing about my 50s.) The new Sally Hansen Miracle Gel (2 steps, no special lights) is the best thing I have ever put on my nails. Those who know me well know that this is proven by the fact that my nails look this good after five days (including a bike ride to Ojai, time on the beach and a major pepper roasting/peeling session). This stuff is better than salon gel or shellac, IMHO, especially since it comes off easy-peasy with my nontoxic Zoya remover.

“Well hot damn,” I thought, “If this stuff can stand up to the beach and peeling roasted peppers, It might work for me!”
When I stopped in at my local drugstore I gravitated towards my favorite nail polish color — shimmery teal — and decided to give it a go. To wear it, you put on a couple coats of the color itself, let it dry, and then use the top coat to “activate” it. The idea here is that instead of curing the polish with a UV light like you do at the salon, it finishes like a regular nail polish and is further “cured” by natural light.

Coffee grounds not included – add your own to get this look
I used three coats rather than the suggested two, because this shimmery shade goes on a little bit streaky. The color itself already gets s A+ in my book! It also dries fast so there’s less of a chance to smudge or chip it. The top coat applies like any old regular top coat. It’s not quite as glossy and “hard” as my standard Seche Vite.

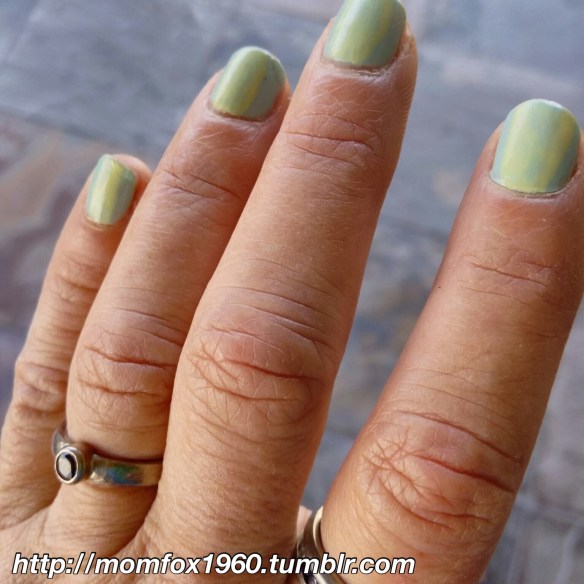
Don’t judge my cuticles, I just told you what I do to my hands!
This is after working two full shifts. As you can see there is minor edge wear on my pinky finger, but I’d have been floored if not – I got it stuck in a metal grate while cleaning an espresso machine. My regular manicure is usually ruined by now and in need of redoing.
I think in the future I may try putting a top coat like Seche Vite over it once everything has dried and had a chance to “cure,” but for two days in this is pretty good! It advertises up to 14 days, but with my job that’s likely impossible.
I’ll check back in in a few days with an update, but given that by now my nails are usually wrecked, I think it’s fair to say that this may indeed live up to being called “Miracle Gel”. If it can take a few days on the hands of a professional barista, it’s got a lot going for it.
Sally Hansen Miracle Gel polish can be found at most drug stores for between $7.99 and $9.99 per bottle, but I have seen it as a “starter kit” of one polish and the topcoat for $12.99-$14.99.
Thanks for the tip, Niki! 😊💅